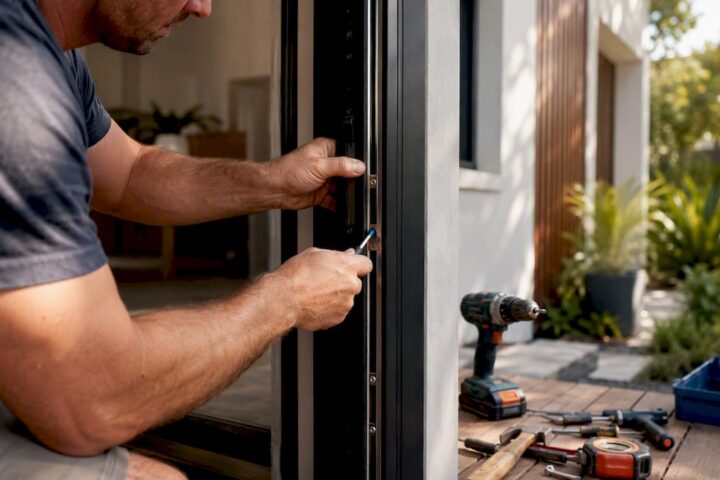
In an emergency, the correct sequence is: isolate power at your household switchboard, locate the manual override on your shutter’s motor housing or pelmet, engage the correct override tool (crank, strap, or hex key), and raise or lower the curtain slowly. The roller shutter manual override is a temporary, emergency-only measure, not a substitute for a working motor. Once you have safe access, the shutter needs to be secured and the motor assessed before you restore power.
Follow these steps immediately if you need emergency access right now:
- Switch off the circuit breaker for the shutter at your household switchboard and, if others are home, label it so no one restores power while you work.
- Locate the override point on the motor housing, pelmet, or bottom rail — look for a round cover plate, a hanging chain, a labelled strap, or a keyhole on the rail face.
- Engage the correct tool (hand crank, hex/Allen key, pull strap, or external key) and operate slowly and steadily.
- Secure the shutter in position before you step away, then call a technician to assess the motor.
Pro Tip: Before removing the pelmet, check the bottom rail face for an external key release. Many Australian installations include one specifically to avoid pelmet removal during emergencies.
Key takeaways
Isolating power at the switchboard before touching any part of an electric roller shutter is the single most important safety step, and manual override is a temporary emergency measure only.
| Point | Details |
|---|---|
| Isolate power first | Switch off the dedicated circuit breaker and label it before accessing the pelmet or override. |
| Identify your override type | Crank socket, chain loop, pull strap, hex key, or external key release each require a different tool and approach. |
| Operate slowly and secure | Turn the crank or pull the strap steadily; secure the shutter in position before removing the override tool. |
| Re-learn may be needed | Some motors auto re-learn end positions after manual use; others need a technician to reprogram limit settings. |
| Easterndoors | Provides inspection, motor reprogramming, and retrofit override installations for Australian homeowners. |
Table of Contents
- Safety checklist before you touch the shutter or pelmet
- Where the manual override is located and the common types you will find
- Step-by-step procedure for each override type
- Tools and items to have ready before you start
- How to re-engage the motor and what to expect with limit re-learn
- Troubleshooting quick checks and when to call a licensed technician
- Routine maintenance and the limitations of manual override systems
- Why some motors need a re-learn after manual operation
- A technician’s perspective on getting this right quickly
- Easterndoors can help when the override is not enough
- Sources
Safety checklist before you touch the shutter or pelmet
Working on an electric roller shutter without isolating power first is a genuine electrical hazard. Australian household energy safety guidance is clear: always switch off the relevant circuit breaker at the switchboard before accessing any powered fitting, and never rely on the wall switch alone, since battery backup systems or automatic controls can restore power unexpectedly.
Run through this checklist before you touch anything:
- Isolate power at the switchboard. Turn off the dedicated shutter breaker, not just the wall switch. Label the breaker “DO NOT SWITCH ON” while you work.
- Check for battery backup. Some smart or solar-powered shutters have a backup battery that keeps the motor live even during a blackout. Confirm the system is fully de-energised before proceeding. (If you are unsure whether your shutter has battery backup, check the smart roller shutters specifications for your model or contact your installer.)
- Check for armed automatic controls. Timer or sensor-driven shutters can activate without warning. Disable any automation via the controller before you open the pelmet.
- Assess the curtain load. Heavily insulated roller shutters can weigh 20 kg or more. For large curtains, have a second person present to support the weight and prevent sudden drops.
- Use a stable ladder and wear gloves. A head-height pelmet on a step ladder is a fall risk. Wear work gloves to protect against sharp slat edges, and use a torch if the area is poorly lit.
- Never force a jammed shutter. If the curtain will not move after gentle pressure on the override, stop. Forcing a jammed mechanism can buckle slats, strip the override socket, or damage the barrel. Call a technician.
NSW Fair Trading recommends engaging licensed tradespeople for electrical repairs and any work where safety is uncertain. If you are not confident at any point in this process, stop and call a licensed roller-shutter technician or electrician.
Where the manual override is located and the common types you will find
Knowing which override type your shutter has before a blackout occurs saves time and prevents damage. There are five common types found on Australian residential installations.
- Crank/hand-winding socket. A round socket on the motor end cap, usually inside the pelmet or accessible through a side cover plate. You insert a hand crank (winding rod) and turn to raise or lower the curtain.
- Chain loop/hoist. A continuous loop chain hanging from the motor housing. Pulling one side of the loop raises the shutter; the other side lowers it. Common on older or commercial-style installations.
- Pull strap/emergency strap. A fabric strap attached to the drive at operating height, fixed to the frame so it is reachable without a ladder. Designed for rapid manual opening, particularly on escape-route shutters.
- Hex/Allen key override. A small hexagonal socket on the motor end cap, operated with a standard hex key. Less common on residential shutters but found on some tubular motor brands.
- External key release on the bottom rail. A keyhole on the face of the bottom rail, operated with a dedicated key. This allows the curtain to be released and raised from outside without accessing the pelmet at all.
Where to look: The crank socket and chain loop are almost always on the motor end of the barrel, accessible from inside the pelmet or through a removable side cover plate. Pull straps are fixed to the frame at roughly waist-to-shoulder height. External key releases sit on the bottom rail face, visible from outside.
Visual cues to look for: a circular plastic cover plate (often orange or red) on the motor end cap signals a crank socket; a hanging loop of ball-chain or flat-link chain indicates a chain hoist; a fabric strap with a loop handle fixed to the frame is the emergency strap; a small keyhole on the bottom rail face is the external key release.
Step-by-step procedure for each override type
The core sequence is the same regardless of override type: isolate power, access the override, engage the tool, operate slowly, secure the shutter, disengage the override, then restore power and test.
Crank/hand-winding socket
- Isolate power at the switchboard and label the breaker.
- Remove the pelmet cover or side access panel (typically two to four Phillips screws).
- Locate the round socket on the motor end cap and remove the cover plate.
- Insert the hand crank fully into the socket.
- Turn slowly and steadily. On most Australian tubular motors, turning clockwise raises the curtain; counter-clockwise lowers it. Confirm the direction with your first half-turn before committing.
- Stop immediately if you hear grinding, feel sudden resistance, or the curtain moves unevenly.
- Once in position, secure the shutter (wedge, prop, or lock the bottom rail) before removing the crank.
- Remove the crank, replace the cover plate and pelmet, then restore power and test with the wall switch or remote.
Chain loop/hoist
- Isolate power. Locate the chain loop hanging from the motor housing.
- Pull the raise side of the loop slowly and evenly. Do not jerk or pull at an angle.
- Secure the shutter once open, then release the chain gently.
Pull strap/emergency strap
- Isolate power. Locate the strap fixed to the frame at operating height.
- Pull the strap firmly and steadily downward to release the drive and raise the curtain.
- The SELVE MAN Rescue system and similar emergency strap mechanisms are designed to reset to normal operation after use. Follow the manufacturer’s reset instruction (typically re-engaging the strap clip) before restoring power.
External key release
- Isolate power. Insert the dedicated key into the keyhole on the bottom rail face.
- Turn as directed (usually a quarter-turn) to release the locking bar.
- Lift the curtain by hand from the bottom rail. Have a second person support the weight on large curtains.
Pro Tip: Mark the crank socket direction with a small arrow sticker after installation. In a blackout with a torch in one hand, knowing which way to turn without guessing prevents stripped sockets and wasted time.
Tools and items to have ready before you start
Having the right tools at hand before a blackout occurs is the difference between a five-minute fix and a frustrating search in the dark.
- Hand crank/winding rod. The size and socket profile vary by motor brand. The manufacturer-supplied crank is usually stored in the laundry, garage, or the installer’s handover box. Check there first.
- Hex/Allen key set. A standard metric set (3 mm–10 mm) covers most residential tubular motor override sockets.
- Phillips head screwdriver. For removing pelmet cover screws (typically No. 2 size).
- Small step ladder. Most pelmets sit at typical indoor window height, requiring a step ladder for access.
- Torch or head lamp. Essential if the outage has cut all lighting.
- Work gloves. Roller shutter slat edges are sharp.
- Labelled storage bag or pouch. Keep the crank, hex keys, and override key together in a clearly marked bag near the shutter or in a known location.
The ROMA user manual advises that manual cranking is for emergency use only and that the correct crank size matters. Do not substitute adjustable pliers or a shifting spanner on a hex socket — they round off the socket faces and make future access far harder.
In Australia, replacement cranks and hex key sets are available from local hardware stores (Bunnings, Total Tools), electrical wholesalers, and roller-shutter service providers. If you are unsure of the correct crank size for your motor, contact your original installer or a licensed roller-shutter technician before you need it in an emergency.
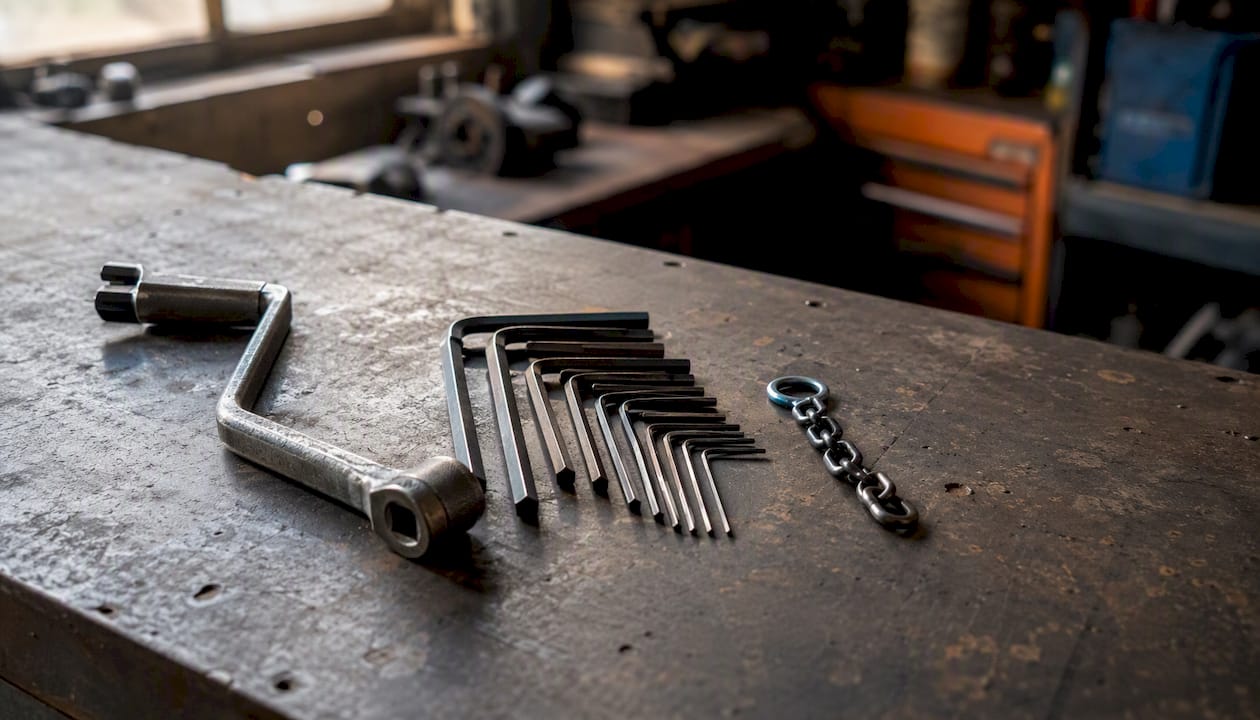
Pro Tip: Photograph your motor’s model label and save it in your phone’s notes app. When you call a supplier or technician, you can confirm the correct crank size immediately rather than guessing.
How to re-engage the motor and what to expect with limit re-learn
Restoring electric operation after manual use is straightforward, but skipping the limit re-learn step on motors that require it can cause the shutter to travel past its end positions and damage the motor or slats.
- Lower the shutter to its fully closed rest position before re-engaging the motor.
- Disengage and stow the override tool (remove the crank, re-clip the strap, or replace the chain guard).
- Replace the pelmet cover and secure all screws.
- Switch the circuit breaker back on at the switchboard.
- Test with the wall switch or remote. Operate the shutter through one full open-close cycle.
Some motors handle the re-learn automatically. The SELVE SEE-NHK drive, for example, includes automatic re-learn of end positions after manual cranking, along with overload protection and obstacle detection. After one full powered cycle, the drive re-calibrates its stored end positions without any manual programming.
Other motors, particularly older or entry-level tubular motors, store end positions electronically and lose them when the barrel is moved manually. These require a programmed limit-set routine after manual operation. The procedure varies by brand and model; refer to your motor’s user manual or contact a licensed technician.
Troubleshooting quick checks and when to call a licensed technician
Most manual override problems fall into two categories: operator error (wrong tool, wrong direction, override not fully engaged) and mechanical or electrical faults that need a professional.
Quick checks to run first:
- Check whether the circuit breaker has tripped rather than the motor failing.
- Replace remote batteries before assuming a motor fault.
- Look for an obvious physical jam (debris in the guide channel, a bent slat caught in the guide).
- Listen for audible grinding when attempting the override — that indicates a mechanical fault, not an operator error.
Stop and call a licensed technician if you notice any of the following:
- The motor hums under load but the curtain does not move.
- The barrel sits off-centre in the housing.
- Slats are visibly bent, buckled, or separated.
- The override socket is stripped or the crank spins without engaging.
- There is a burning smell or visible smoke near the motor housing.
- The shutter will not hold its position after manual operation.
When you call a technician, be ready with:
- The shutter’s location (which room or opening).
- The motor brand and model number (on the motor label inside the pelmet).
- Photos of the fault or damage.
- Whether the shutter has been manually operated recently.
NSW Fair Trading is clear that electrical repairs to motorised fittings require a licensed electrician. Roller-shutter-specific mechanical work (barrel, guides, slats, override mechanisms) should be handled by an accredited roller-shutter technician.
Pro Tip: Turn off the circuit breaker and leave it labelled off until the technician arrives. A shutter with a stripped socket or off-centre barrel can drop suddenly if power is accidentally restored.
Routine maintenance and the limitations of manual override systems
A manual override that has never been tested is not a reliable emergency tool. Annual testing is the minimum standard recommended by Australian trade guides and local service providers, including Fix My Shutters.
Annual maintenance checklist:
- Inspect the pelmet interior for corrosion, debris, and loose wiring.
- Check the override socket or strap for wear, corrosion, or deformation.
- Lubricate the guide channels with a silicone-based lubricant (follow your manufacturer’s guidance — petroleum-based lubricants can degrade plastic components).
- Test the override by disengaging the motor and operating the curtain manually through a short travel distance, then re-engaging.
- Confirm the crank and override key are stored in their labelled bag and are accessible.
Limitations to understand:
- Manual overrides are for emergency use only. Frequent manual operation signals a motor or control fault that needs professional attention, not a workaround.
- Some older or budget installations have no override mechanism at all. If you cannot locate any override point, do not force the motor housing open.
- Certain mechanical failures (a seized barrel, a sheared drive pin) mean the override will not work regardless of technique. In those cases, the shutter needs professional service.
- Retrofit override kits exist for shutters that lack one, but fitting them requires a technician to access the motor and barrel safely.
Why some motors need a re-learn after manual operation
Many residential tubular motors include a freewheel clutch or a mechanical decoupler that disconnects the drive from the barrel during manual operation. This protects the motor’s internal gears from being back-driven. When the clutch re-engages after manual use, the motor’s electronic control board no longer knows where the barrel sits relative to the stored end positions.
Modern drives address this with automatic re-learn routines. The SELVE SEE-NHK is one example: after manual cranking, the drive re-learns its end positions automatically on the first powered cycle, and its obstacle detection and overload protection remain active throughout. Older drives without this feature require the installer or a technician to run a manual limit-set routine, which involves running the shutter to each end position and saving those points to the motor’s memory.
Safety features such as obstacle detection and overload protection are designed to cut motor power if the curtain meets unexpected resistance. These features rely on the motor knowing its end positions accurately. A motor operating without correct limit data may not trigger obstacle detection reliably, which is why the ROMA user manual instructs that end-position programming must be performed by a trained specialist after any disturbance to the drive.
A technician’s perspective on getting this right quickly
The most common reason a manual override fails in an emergency is not a mechanical fault. It is that the homeowner cannot find the crank, does not know which breaker controls the shutter, or has never tested the override before needing it at 11 PM during a storm.
A few habits that experienced technicians consistently recommend:
- Label the shutter breaker clearly at the switchboard, not just with a number but with the room or opening it controls.
- Store the crank in a marked pouch fixed to the wall near the shutter, not in a drawer two rooms away.
- Test the override annually as part of your home maintenance routine. A five-minute test once a year confirms the socket is not corroded, the crank fits, and you know which direction to turn.
- Never attempt DIY motor programming. Limit-set routines on modern drives involve specific button sequences and timing that vary by brand. An incorrect sequence can corrupt the motor’s stored settings and require a full factory reset by a technician.
The other overlooked point: a shutter that needs manual override regularly is telling you something. If you are reaching for the crank more than once or twice a year, the motor, control board, or wiring needs professional assessment, not repeated workarounds. Considering an upgrade to a motor with battery backup or solar power can eliminate the need for manual operation during short outages entirely. The solar roller shutters guide covers those options for Australian homeowners.
Easterndoors can help when the override is not enough
When a manual override reveals a deeper fault — a stripped socket, a motor that will not re-learn its limits, or a shutter with no override at all — the next step is a professional inspection.

Easterndoors provides inspection, emergency release repairs, motor reprogramming, and retrofit override installations for homeowners across our service area. The team handles the full scope: assessing the motor and drive, re-learning or reprogramming limit positions, fitting a retrofit override where none exists, and advising on upgrades when the existing motor has reached the end of its reliable life. Before you call, have your shutter’s location, motor brand and model number, and a photo of the fault ready — it speeds up the assessment considerably. To book a service visit or get a quote, visit the Easterndoors service and installation page or contact the team directly through the website.
Sources
The following sources were used in preparing this guide. Consult them for model-specific instructions and regulator advice.
Recommended
- Smart roller shutters: security and energy savings for homeowners | Eastern Security Doors
- Roller shutters insulation: the Australian homeowner’s guide | Eastern Security Doors
- Solar roller shutters: the Australian homeowner’s guide | Eastern Security Doors
- Roller shutter cost in Australia: 2026 price guide | Eastern Security Doors